How To Draw A Starfish: A Step-by-Step Guide For Beginners
So here’s the thing, drawing a starfish—also known as "dessiner une etoile de mer" in French—can be super fun and surprisingly easy if you’ve got the right approach. Think about it: starfish are these cool little sea creatures with shapes that are simple yet iconic. If you're into art or just looking for a fun activity, this is your jam. You don’t need to be Picasso to pull this off, trust me. Grab your pencil, and let’s get started.
Now, before we dive into the nitty-gritty of how to draw a starfish, it’s important to remember that practice makes perfect. Even if your first attempt doesn’t look exactly like what you imagined, that’s totally fine. Art is all about expressing yourself, so feel free to let your creativity flow. Plus, we’re going to break it down step by step so you can follow along easily.
And hey, don’t worry if you’re a total beginner. This guide is designed to be super beginner-friendly, so even if you’ve never picked up a pencil before, you’ll be drawing starfish like a pro in no time. Let’s make it happen!
- Kyara Marteau Lavail The Untold Story Behind Her Death
- Wejdene Sextape The Truth Behind The Controversy
Why Draw a Starfish?
Alright, let’s talk about why starfish are such a great subject to draw. First off, they’re just so visually appealing. Their symmetrical design makes them a perfect canvas for beginners and experts alike. Plus, they carry a certain charm that makes them stand out in the world of sea creatures. Drawing a starfish can also be a great way to relax and unwind. There’s something therapeutic about creating art, and starfish are just the right level of complexity to keep things interesting without being overwhelming.
What You’ll Need to Get Started
Before we jump into the drawing process, let’s go over what you’ll need. Here’s a quick list:
- A good old-fashioned pencil
- An eraser—because mistakes happen, and that’s okay
- A piece of paper—any kind will do, but smoother paper tends to work better
- Optional: colored pencils or markers if you want to add some color to your masterpiece
Understanding the Starfish Shape
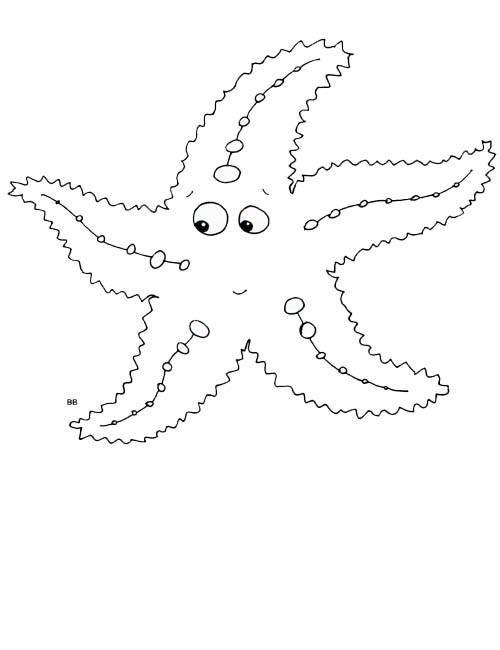
One of the coolest things about starfish is their unique shape. Most starfish have five arms, but some species can have as many as 40! For our purposes, we’ll stick with the classic five-arm design. The key to drawing a starfish is understanding its symmetry. Each arm is roughly the same size and shape, which makes it easier to replicate. Take a moment to study a picture of a starfish if you can. Notice how the arms taper slightly towards the ends and how the body is slightly raised in the center.
- Sophie Rain Spiderman Video Tutorial The Ultimate Guide To Mastering The Art Of Webslinging
- Recharge Tiktok Coins The Ultimate Guide To Boosting Your Virtual Currency
Step-by-Step Guide to Drawing a Starfish
Step 1: Start with a Circle
Begin by drawing a small circle in the center of your paper. This will serve as the body of your starfish. Don’t worry about making it perfect—remember, it’s all about the process.
Step 2: Add the Arms
Now, draw five lines extending from the circle. These will be the arms of your starfish. Try to make them roughly the same length and thickness. Think of them as spokes on a wheel, radiating out from the center.
Step 3: Shape the Arms
Once you’ve got the basic outline of the arms, start shaping them. Give them a slight curve and taper them towards the ends. This will give your starfish a more natural look.
Step 4: Add Details
Now it’s time to add some details. Draw small bumps or ridges along the arms to mimic the texture of a real starfish. You can also add some small circles or dots to represent the tiny tubular feet that starfish use to move around.
Step 5: Final Touches
Take a step back and look at your drawing. Is there anything you want to adjust? Maybe one arm is a little too long or one bump is a bit too big. Now’s the time to make those tweaks. Once you’re happy with your drawing, you can erase any unnecessary lines and clean it up.
Tips for Perfecting Your Starfish Drawing
Here are a few tips to help you take your starfish drawing to the next level:
- Study real starfish photos to get a better understanding of their anatomy.
- Practice symmetry by using a light pencil to sketch guidelines before drawing the arms.
- Experiment with different textures and patterns to make your starfish unique.
- Don’t be afraid to make mistakes—they’re all part of the learning process.
Adding Color to Your Starfish
Once you’ve mastered the basic shape of your starfish, it’s time to bring it to life with color. Starfish come in a variety of colors, from bright orange to deep purple, so let your imagination run wild. Here’s how you can add color:
Using Colored Pencils
Colored pencils are a great option because they allow for fine detail. Start by coloring the body of your starfish with a base color, then layer on additional colors to create depth and texture. You can also use a white pencil to highlight certain areas for a more realistic look.
Using Markers
If you prefer a bolder look, markers are the way to go. Choose a few different shades of the same color and blend them together to create a gradient effect. This will give your starfish a vibrant, eye-catching appearance.
Common Mistakes to Avoid
Even the best artists make mistakes from time to time. Here are a few common pitfalls to watch out for when drawing a starfish:
- Making the arms too thin or uneven
- Forgetting to add texture and detail
- Not paying attention to symmetry
- Overworking the drawing and losing the natural flow
Conclusion: Keep Practicing and Have Fun
And there you have it—a step-by-step guide to drawing a starfish. Remember, the key to becoming a better artist is practice, practice, practice. Don’t get discouraged if your first few attempts don’t turn out exactly how you imagined. Every drawing is a learning experience, and you’ll get better with time.
So, what are you waiting for? Grab your pencil and start drawing. And when you’re done, don’t forget to share your masterpiece with the world. Who knows, maybe you’ll inspire someone else to pick up a pencil and try their hand at drawing a starfish. Happy drawing!
Table of Contents
- Why Draw a Starfish?
- What You’ll Need to Get Started
- Understanding the Starfish Shape
- Step-by-Step Guide to Drawing a Starfish
- Step 1: Start with a Circle
- Step 2: Add the Arms
- Step 3: Shape the Arms
- Step 4: Add Details
- Step 5: Final Touches
- Tips for Perfecting Your Starfish Drawing
- Adding Color to Your Starfish
- Common Mistakes to Avoid
- Conclusion: Keep Practicing and Have Fun


Detail Author:
- Name : Ms. Matilda Padberg
- Username : wilderman.queenie
- Email : hahn.carol@gmail.com
- Birthdate : 2006-07-03
- Address : 8107 Gleason Cliffs Apt. 591 East Dereckhaven, NM 38468
- Phone : (954) 662-1886
- Company : Wintheiser-Ruecker
- Job : Preschool Education Administrators
- Bio : Possimus amet rerum et sit. Aperiam est aliquam aspernatur laudantium voluptas.
Socials
tiktok:
- url : https://tiktok.com/@sasha_id
- username : sasha_id
- bio : Libero ipsa dolor accusamus amet necessitatibus quam explicabo ex.
- followers : 2048
- following : 2129
facebook:
- url : https://facebook.com/sasha_official
- username : sasha_official
- bio : Impedit ut dolores nostrum adipisci esse odio.
- followers : 1842
- following : 80
